Create Task
Tasks are precise planning items with a performer, date, priority, and a description. They can also have files and an optional call attached.
The flow works the same way across 3 platforms: web app, mobile app, and AI agents.
Open the task form
Click the plus icon in the side menu and select Task. An empty form opens.
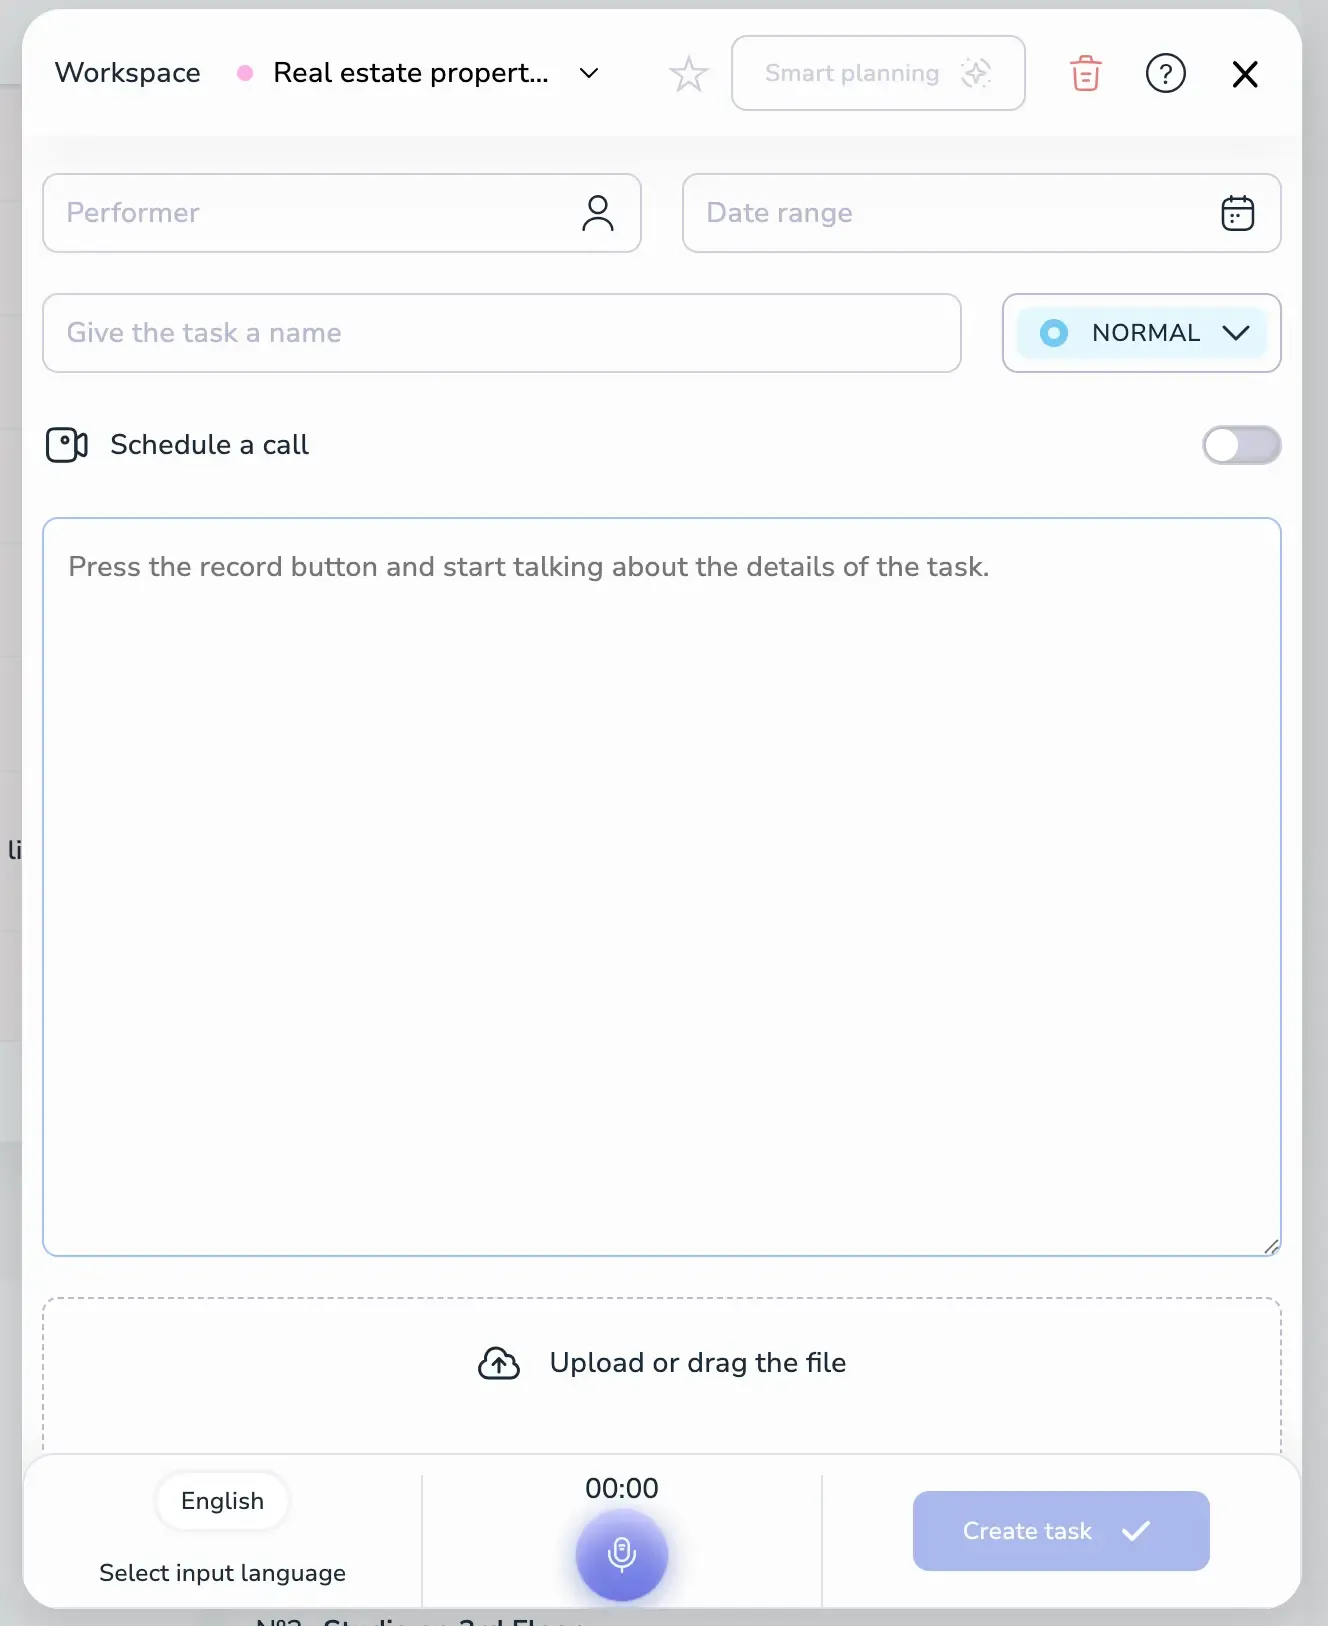
The form contains:
- Performer — who the task is assigned to.
- Date range — start and end date for the task.
- Task name — short title.
- Priority — Normal by default; click to change.
- Schedule a call — toggle to attach a call to the task. See Create a Meeting for details.
- Description area — type the details or dictate them with the microphone.
- Upload or drag the file — attach files.
- Create task — save the task. The button stays disabled until the required fields are filled.
Step 1: Enter task content
You can fill the task in two ways.
Voice input (recommended):
- Select the input language at the bottom left.
- Press the microphone button.
- Speak naturally about the task.
- Voiset transcribes the speech and auto-detects performer, date, and priority from the context.
Text input:
- Type or paste the task description.
- Click Smart Planning at the top of the form — the AI analyzes the text and fills in performer, date, and priority.
- Review the auto-filled fields and edit anything that needs to be changed.
Step 2: Configure details
Performer
Pick a performer from the workspace users. To assign the task in a different workspace, switch the workspace from the dropdown at the top of the form.
Date and workload visualization
Click the Date range field to open the calendar. The calendar highlights how busy each day is, so you can pick a day that fits your team's workload.

Color coding for days:
- Green circle — light load, most available.
- Orange circle — medium load.
- Red circle — heavy load, busy day.
- Blue circle — currently selected day.
On the right of the calendar, the selected performer's daily timeline shows existing tasks hour by hour, so you can see exactly when they are free.
Below the calendar:
- Set time — turn on to make this a timed task with start and end time instead of an all-day task.
- Repeat — turn on to create a recurring task.
Priority
Click the NORMAL chip next to the task name to change the priority level.
Step 3: Add files (optional)
Drag files into the Upload or drag the file area or click it to browse.
Step 4: Create the task
Review the fields and click Create task. The task appears in the calendar and the task list of the selected workspace.
Form actions
In the form header you can:
- ★ Star — mark the task as a favorite for quick access.
- 🗑 Trash — discard the draft.
- ? Help — open contextual help.
- ✕ — close the form without saving.
Cross-platform consistency
The task creation flow is identical across:
- Web app
- Mobile app (Android / iOS)
- AI agents (ChatGPT plugin)
Voice input, Smart Planning, and the workload calendar work everywhere.