Create Repeatable Task
Repeatable tasks follow the same creation flow as regular tasks, but include one additional step for recurrence.
This means you still start the same way: you create a task, define its main parameters, and then enable repetition. In practice, this gives you the same simple task creation flow, but with the ability to turn it into a recurring schedule.
Task creation starts the same way
Click + to create a new task.

The default screen already contains everything you need to build a real task in just a few clicks. At this stage, you can define:
- The task content.
- The performer.
- The workspace.
- The date and time.
- The priority.
- Optional files.
After the first step, the task is already ready. Once performer, date, priority, and content are set, Voiset can create a real task in one click.
Step 1: Enter task content
You can enter the task in two ways.
Voice input
- Select the input language.
- Press the microphone button.
- Speak naturally.
- Voiset automatically recognizes the performer, date, and priority.
Text input
- Type or paste the task description.
- Click Smart Planning.
- Voiset analyzes the text and automatically fills in performer, date, and priority.
This is usually enough to create the task. However, you can still adjust every field manually if you want more control.
Step 2: Configure task details
Performer
Choose the performer from the users in your workspace. If you need to work in another workspace, use the dropdown at the top of the task form. Each workspace has its own user set.
Date and time
Click the date field to change date and time.
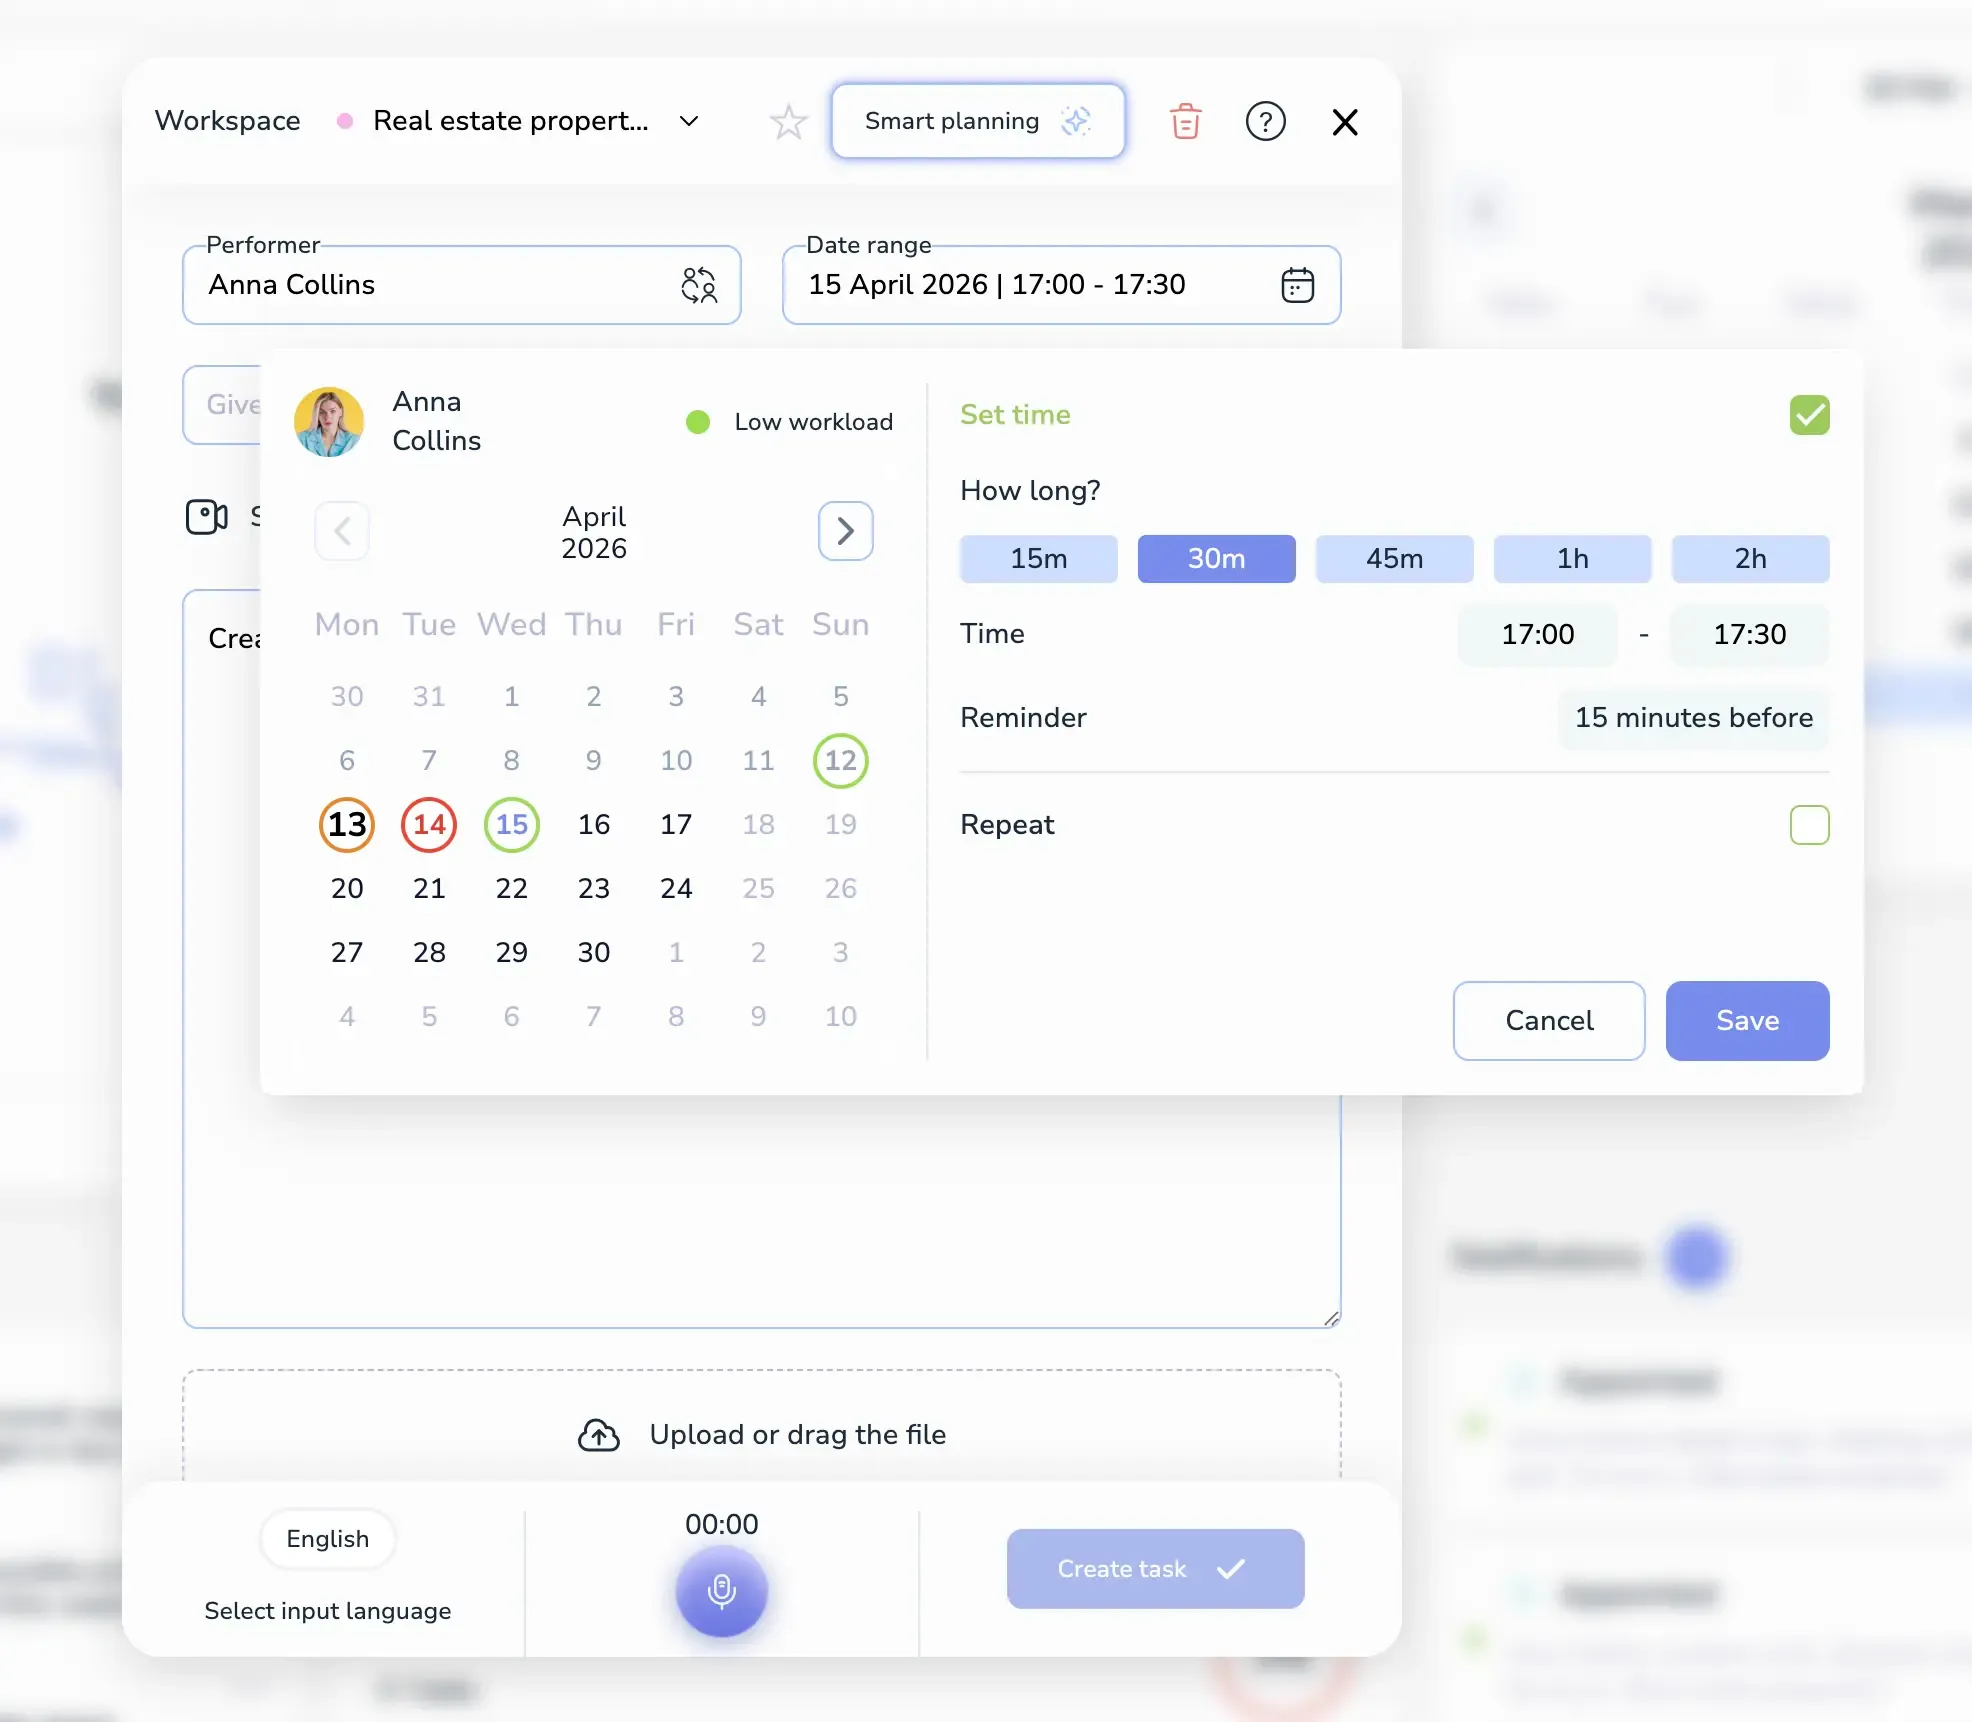
The calendar shows workload using color indicators:
- Red — busy day.
- Orange — less loaded day.
- Green — the most available day.
Tasks can be created in two formats:
- All-day tasks.
- Timed tasks with a specific start and end time.
In the time settings window, you can also set the duration, start and end time, and reminder time. If you already specify these details while speaking, Voiset can recognize them automatically.
Priority
The priority is set automatically when possible, but you can also change it manually.
Files
You can attach any files to the task. We recommend avoiding heavy files because they may slow down loading, especially on mobile.
Star icon
The star icon at the top lets you cancel or remove selected tasks if needed.
Step 3: Enable repeat
After the main task details are filled in, check the Repeat box.
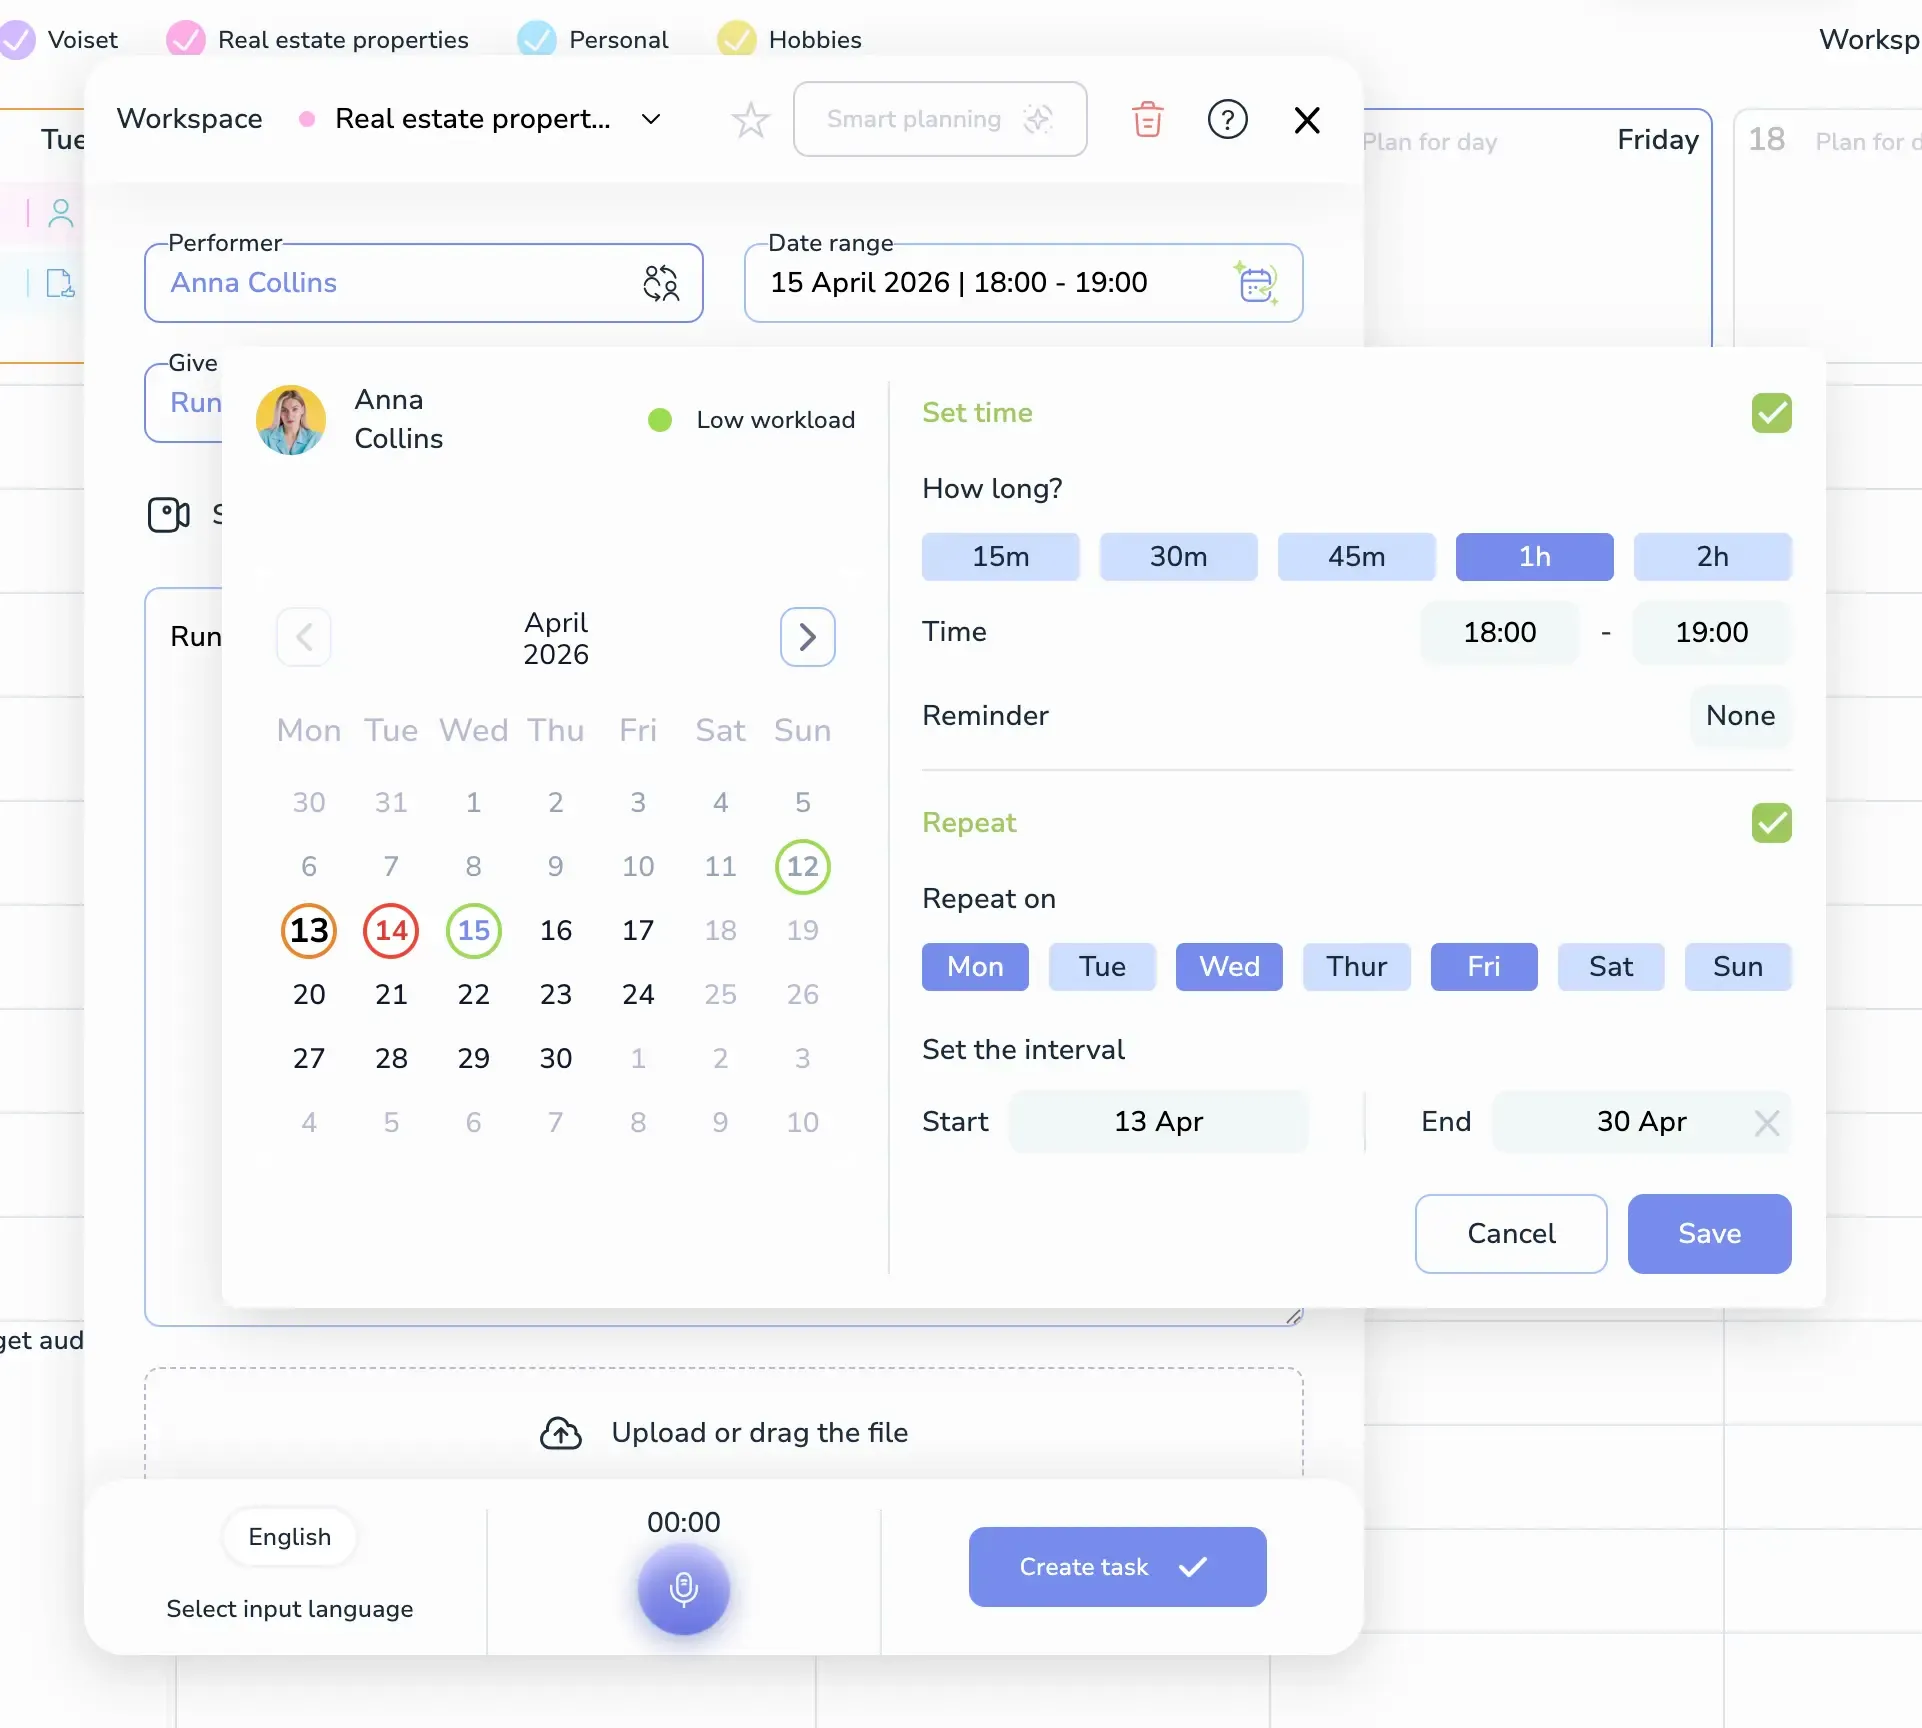
When repeat is enabled, Voiset shows extra recurrence settings:
- Select the days of the week when the task should repeat.
- Set the recurrence interval.
- Choose the start date.
- Choose the end date if the recurrence should stop at a specific time.
If you do not set an end date, Voiset will plan repeating tasks for the next 6 months.
By default, repeated tasks are created every day unless you limit them to specific weekdays.
Step 4: Save the task
After all settings are ready, click Save.
Voiset will create the repeating task according to the recurrence rules you selected. The task will then appear in your calendar and continue repeating based on the schedule you defined.
How the process works in practice
The full flow is simple:
- Create the task content.
- Let Voiset recognize the important parameters.
- Review and adjust the performer, workspace, date, priority, and files.
- Enable repeat.
- Set recurrence days and period.
- Save.
This makes repeatable tasks feel like a natural extension of normal task creation rather than a separate complex feature.
Video walkthrough
Watch how repeating tasks are created in Voiset:
Ready result
After confirmation, Voiset creates the task and schedules all repeated instances according to your settings.