Create a Meeting
Creating a meeting in Voiset takes two required steps inside the unified create form: turn on the Schedule a call toggle and pick a call provider. Without both of these, the form will create a task or an event — not a call.
What the form creates
Voiset uses a single form for tasks, events, and calls. What gets created depends on two things:
| Schedule a call toggle | Call provider | Result |
|---|---|---|
| On | Selected | A call / meeting |
| Off | — | A task or an event (an event is created when you set a start and end date) |
To create a meeting, both conditions must be true: the toggle is on and a provider is selected.
Meeting creation process
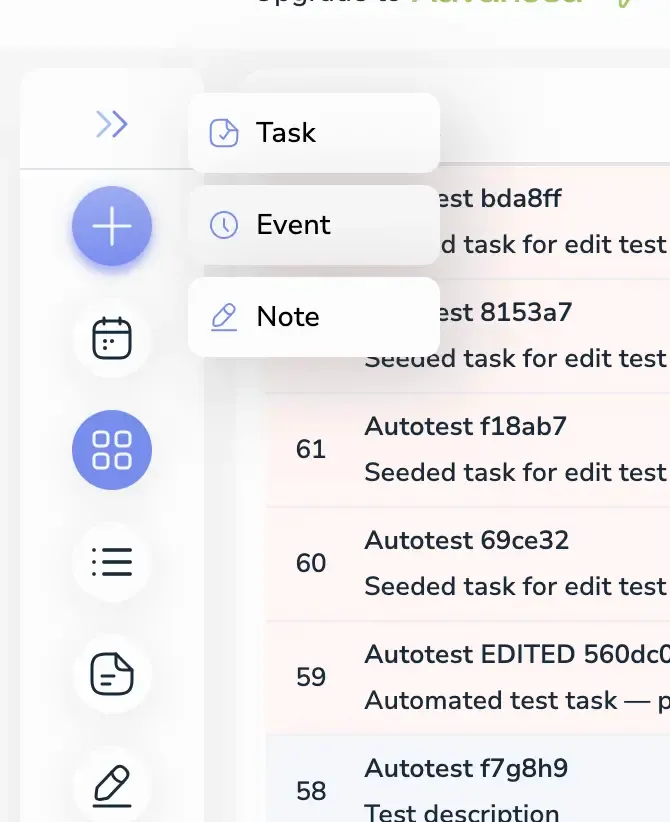
1. Open the form
Click the plus icon in the side menu and select Event.
2. Set the workspace
The current workspace is selected by default and the meeting will be created there. You can switch to any target workspace from the dropdown at the top of the form.
3. Turn on Schedule a call
Toggle Schedule a call on. This is required for the form to create a call instead of a task or event.
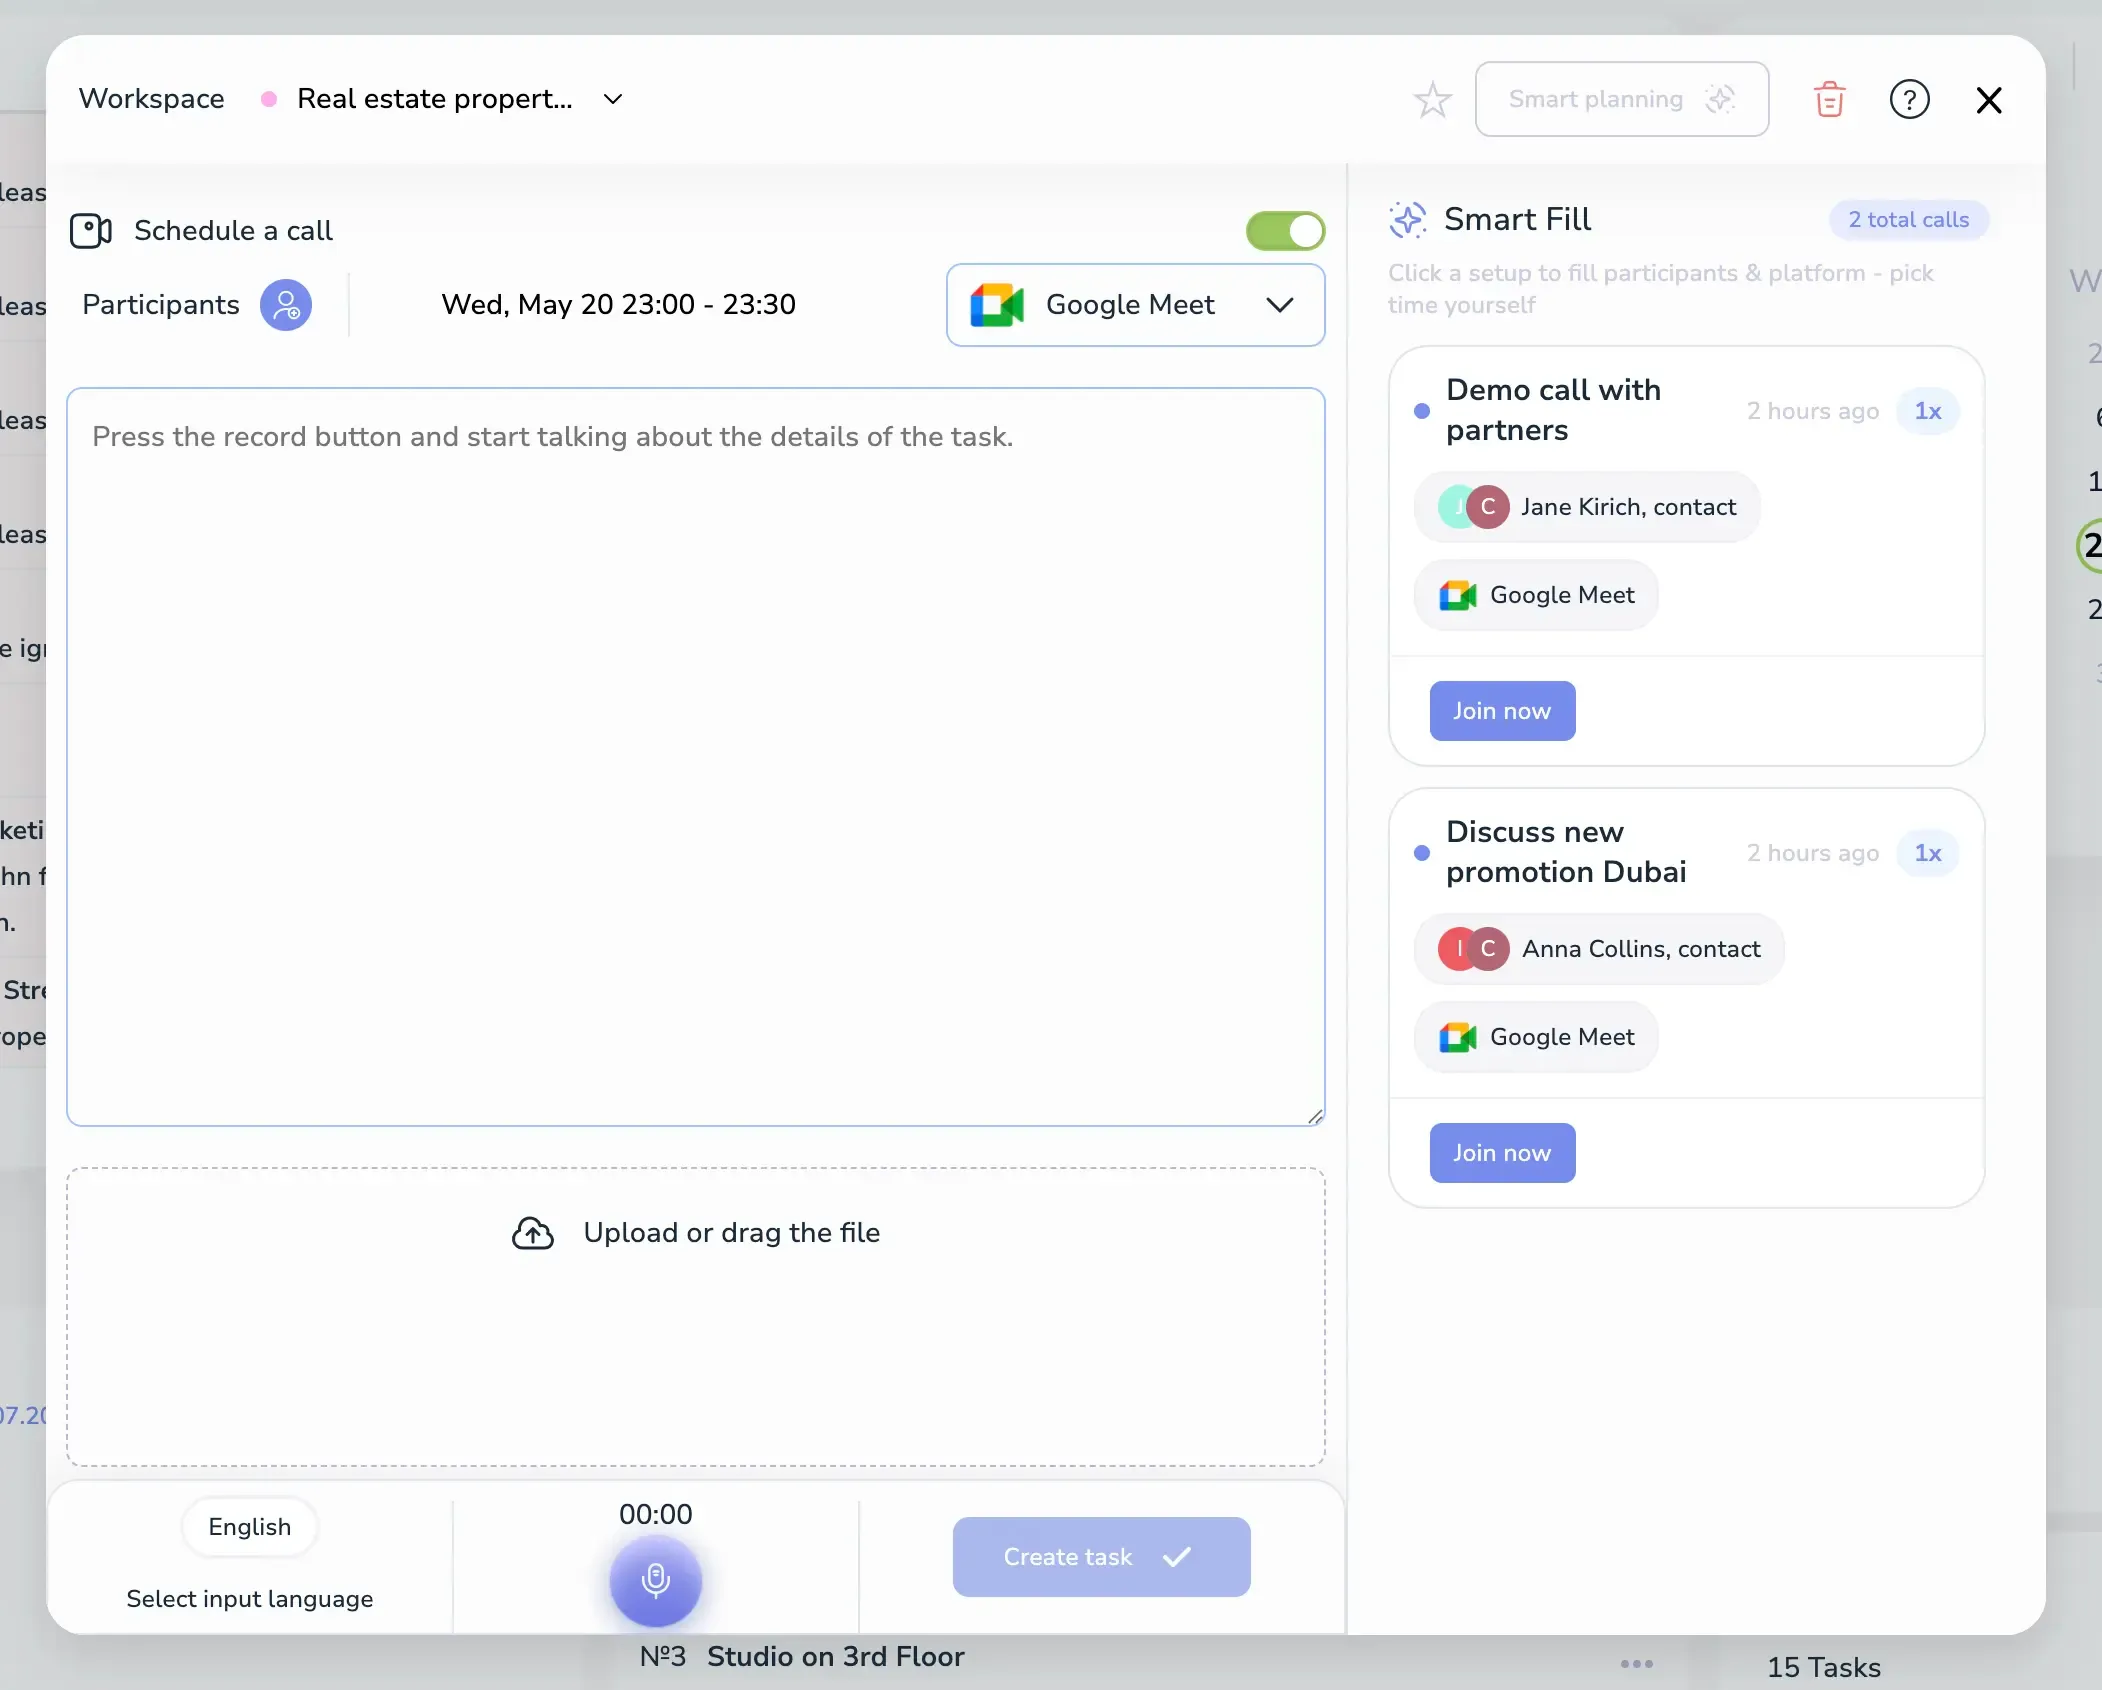
4. Select a call provider
Pick a connected provider from the dropdown next to the toggle — Google Meet, Microsoft Teams, or Zoom. The primary provider is selected by default.
5. Use Smart Fill (optional)
The Smart Fill panel on the right shows your recent call setups so you can recreate them in one click. Each card displays:
- The previous meeting title.
- The participants used.
- The call provider used.
- How recently the setup was used and how many times.
Click a card to instantly fill participants and the platform — you only need to pick the time yourself.
6. Add participants
Click the Participants icon to open the participant picker.
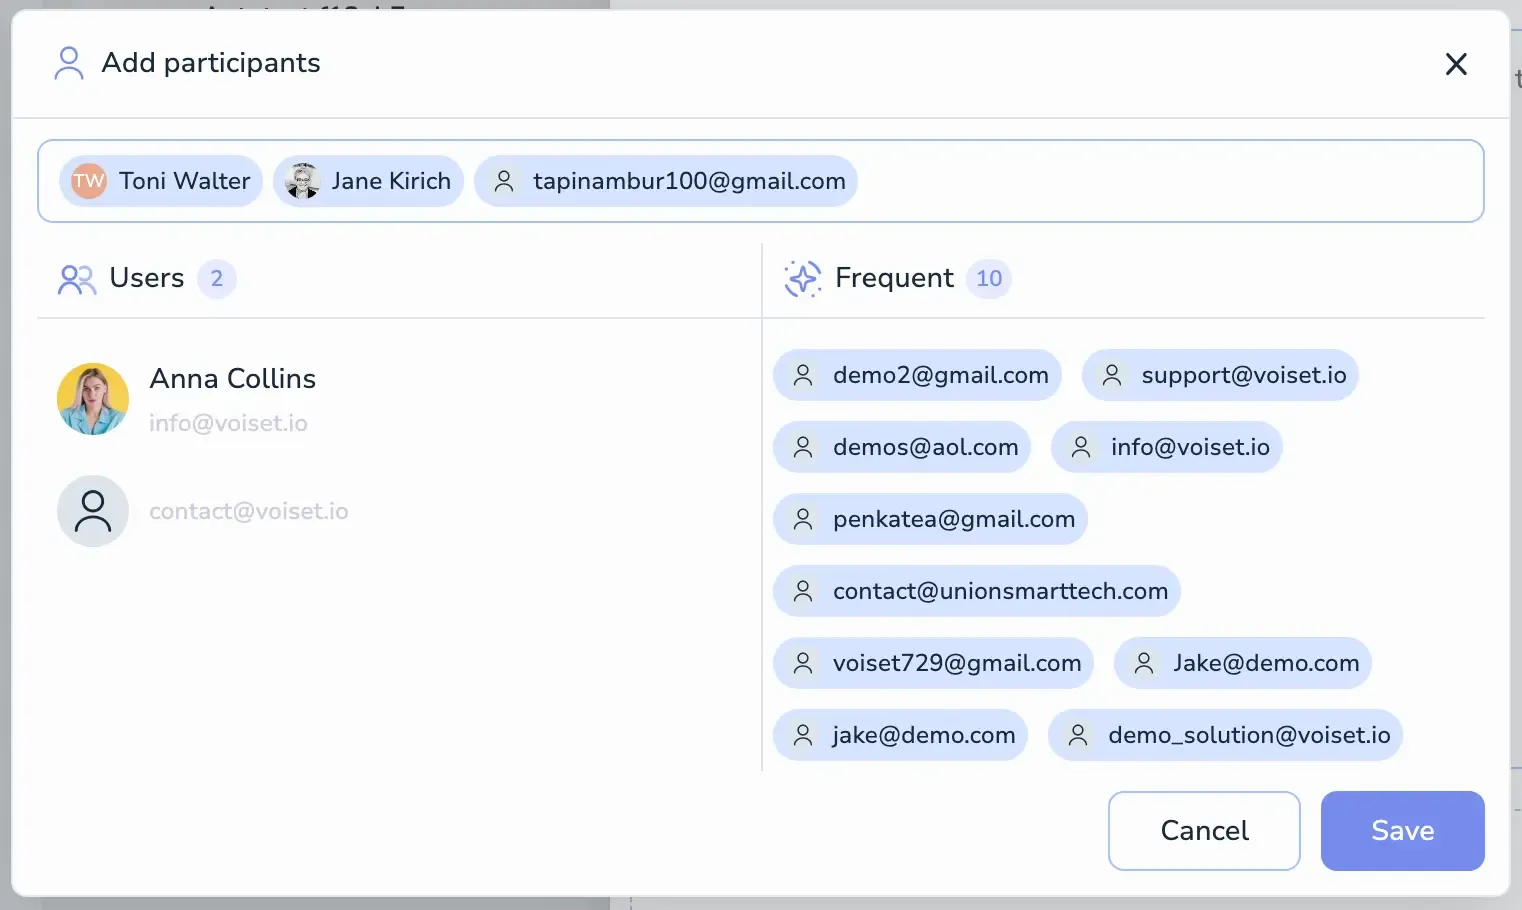
In the dialog:
- Selected chips at the top show everyone added so far. Click the ✕ on a chip to remove a participant.
- Users — workspace members you can add in one click.
- Frequent — emails you contact most often, ready to add as guests.
- You can also type any email directly in the chip field at the top to invite an external participant.
Click Save to confirm the participant list.
7. Set the date and time
Click the date/time area to open the Setting the Date and Time dialog.
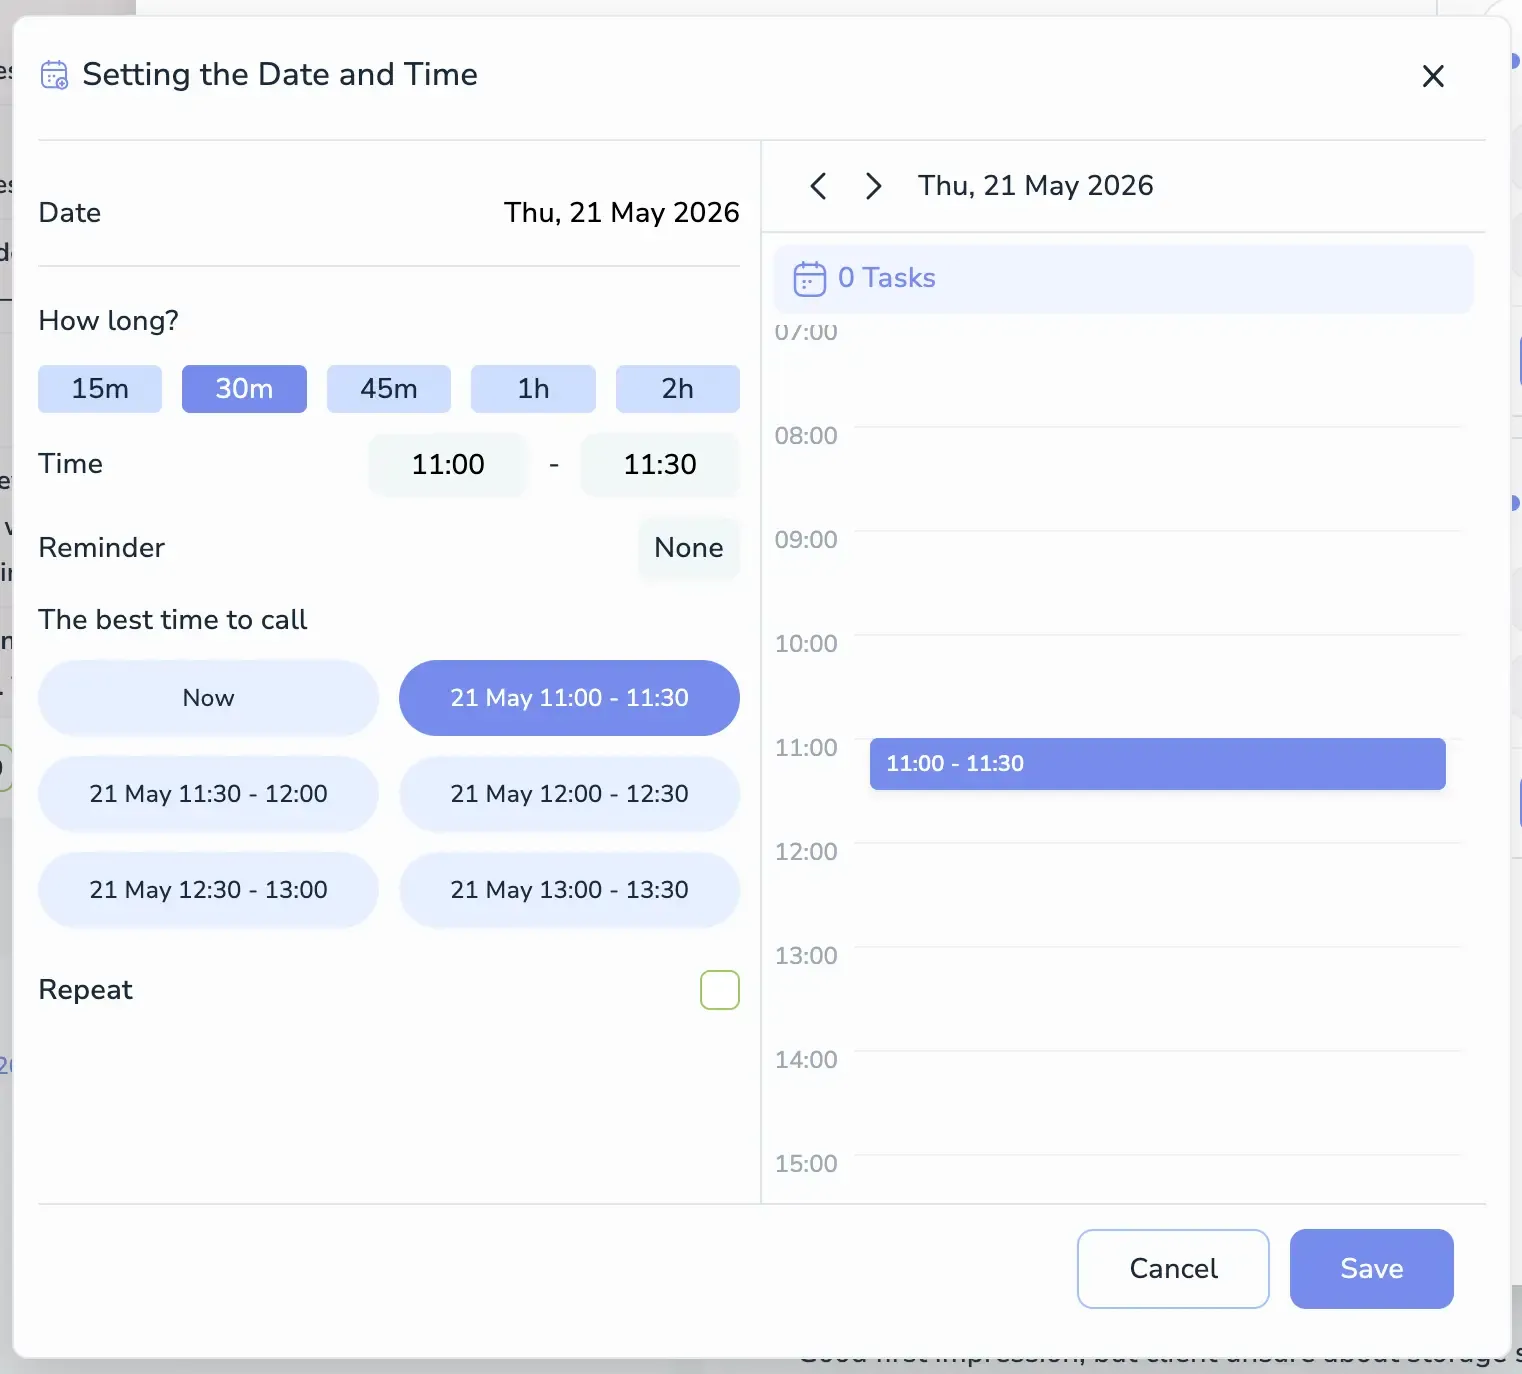
In the dialog you can:
- Date — pick the day for the call.
- How long? — choose a duration preset: 15m, 30m, 45m, 1h, or 2h.
- Time — fine-tune the exact start and end time.
- Reminder — set a notification before the call starts.
- The best time to call — the AI automatically analyzes participants' calendars and suggests free slots, starting with Now and the next available intervals for the selected day. Click a slot to apply it instantly.
- Repeat — enable to create a recurring call.
The right side of the dialog shows your daily timeline, so you can see your busy time visually and confirm the chosen slot does not overlap with other events. Click Save to confirm.
8. Add a title and details
In the main field, type the meeting title (for example, "Demo call with partners"). You can also:
- Attach files in the Upload or drag the file area.
- Dictate the description using the microphone — pick the input language at the bottom left if needed.
9. Save
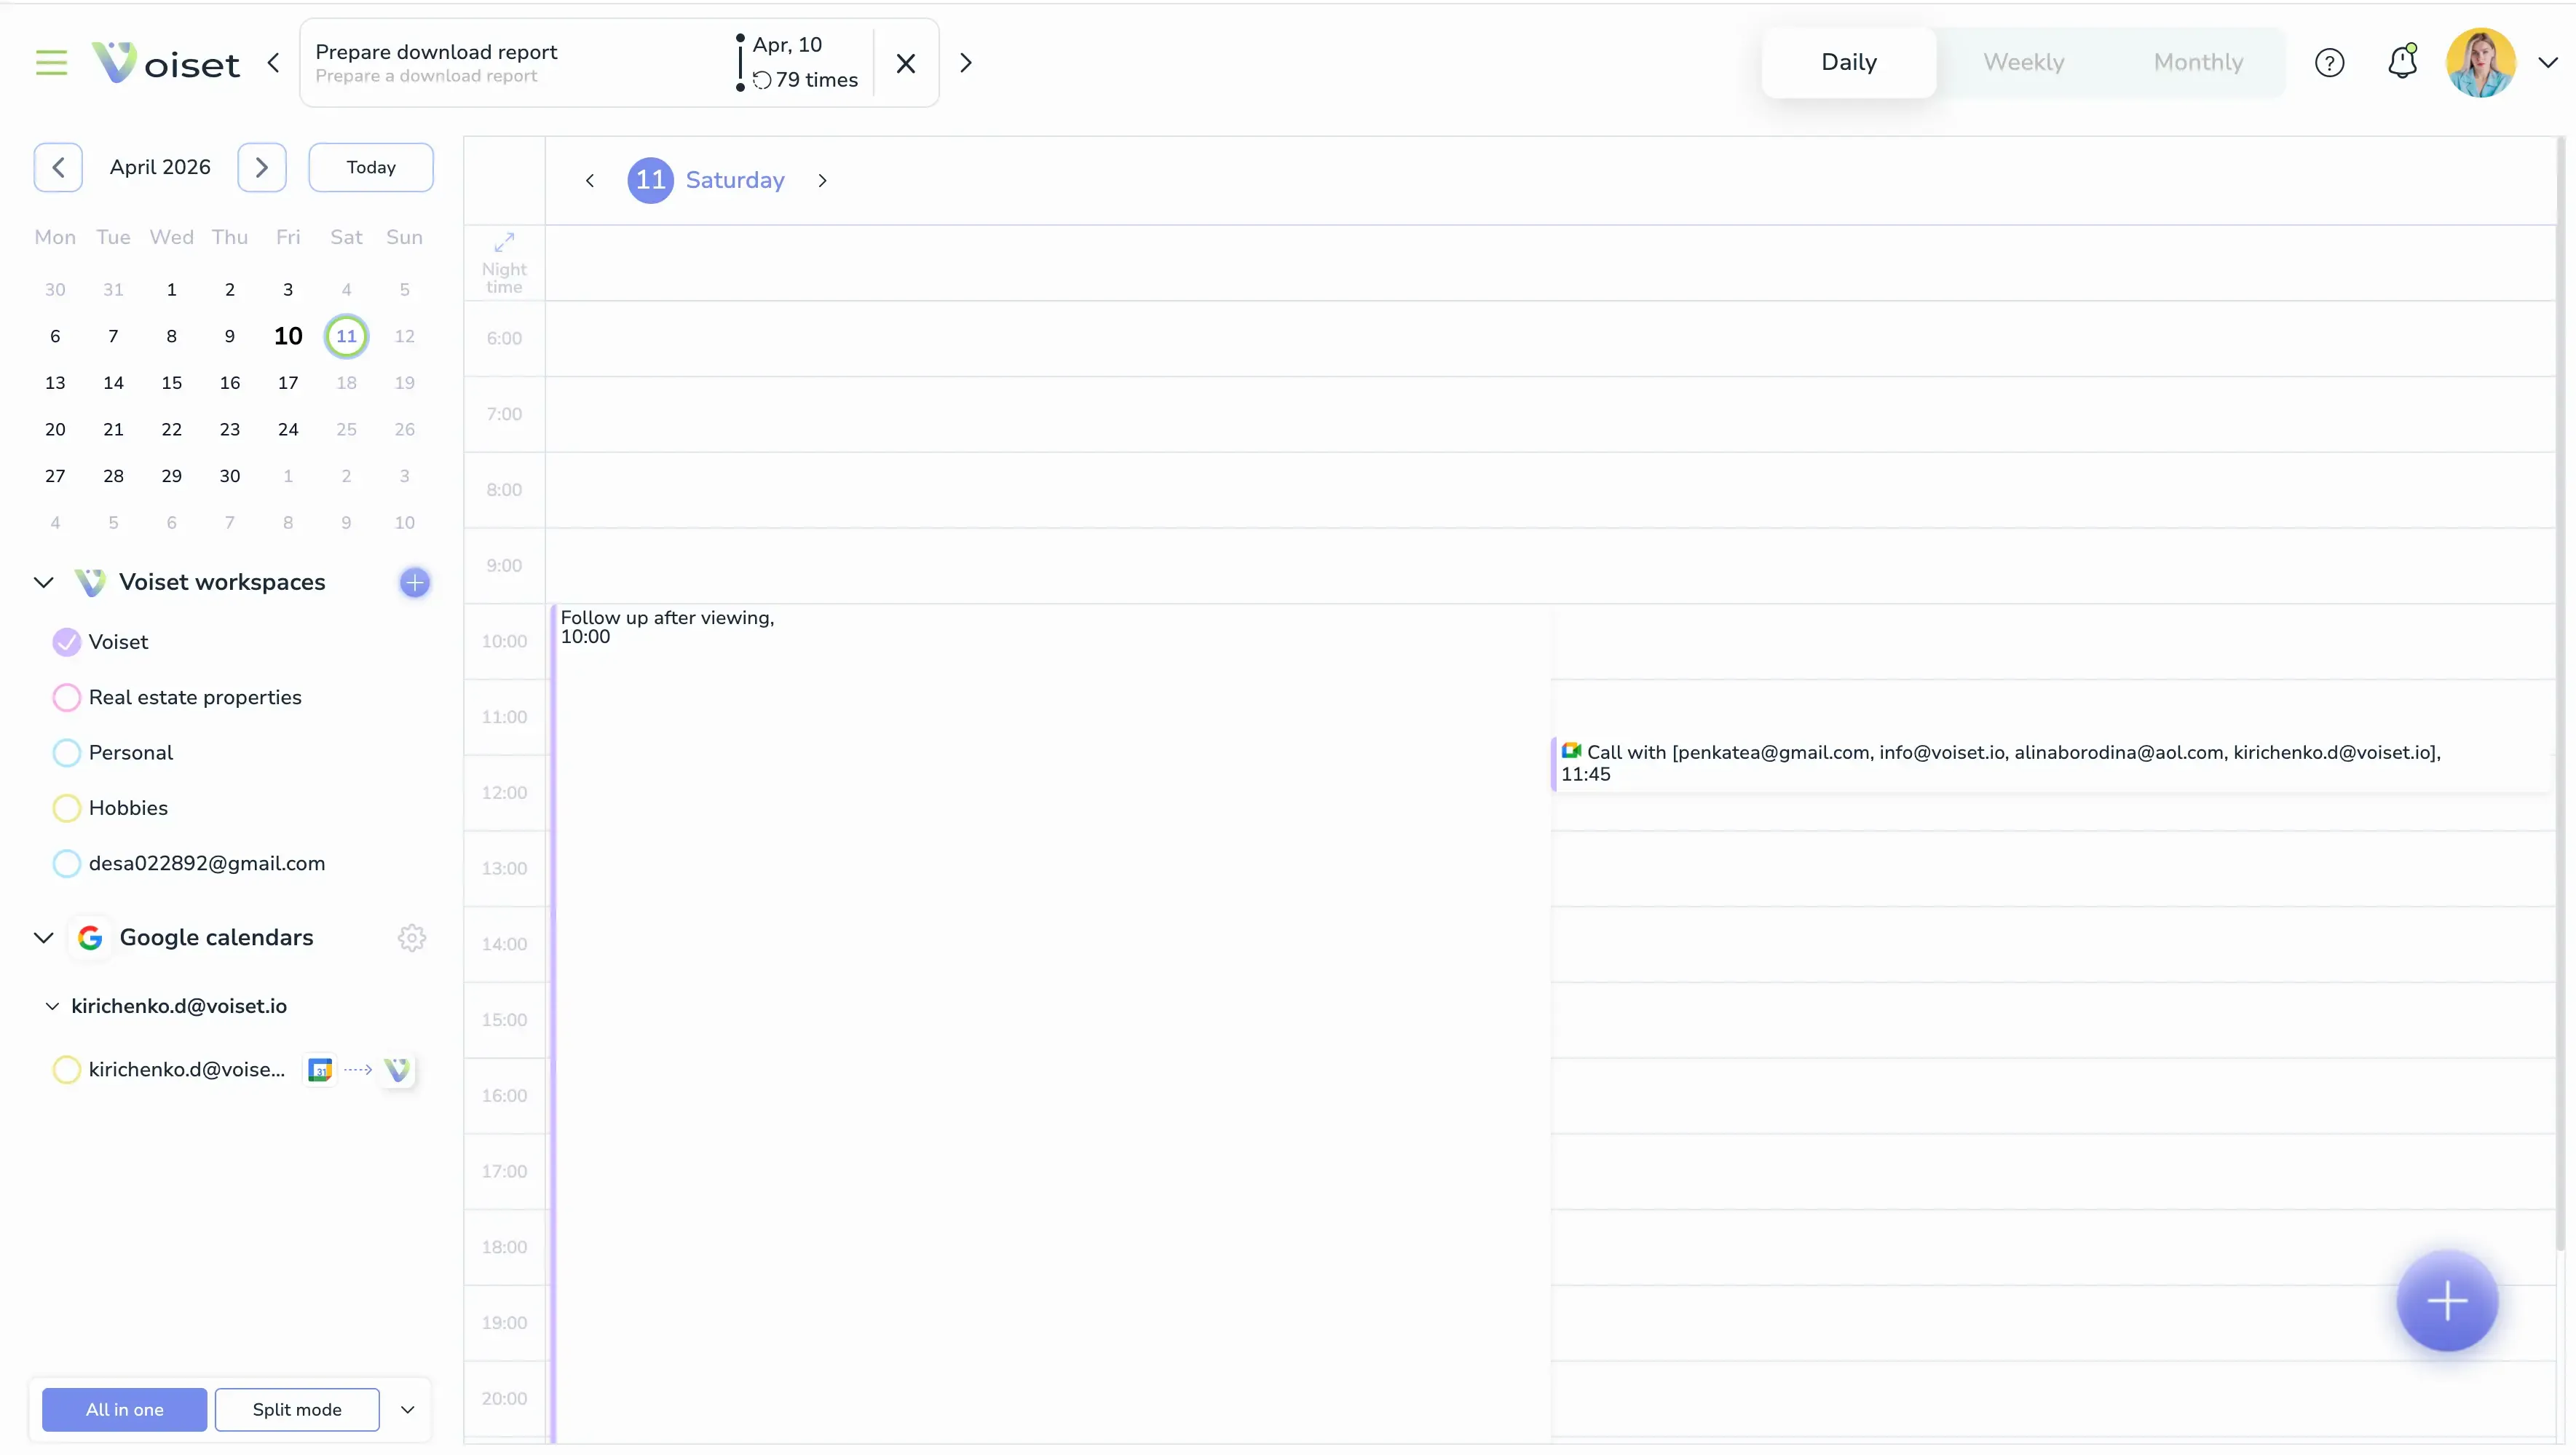
When all parameters are set, click Create task. The call appears in your calendar.
How events are created
Voiset creates the meeting on the selected platform and adds participant emails.
Key rule: the meeting event is created in every workspace that is connected to a call provider.
Multiple workspaces
If you create a call in a workspace that is not associated with any call provider calendar, the system automatically creates two events. The first is created in the target workspace. The second is created in the workspace associated with the connected calendar.
For example:
- Workspace A is connected to Google Meet.
- Workspace B is used only for managing work tasks.
If a user creates a call in Workspace B using Google Meet, the event will be created in both Workspace A and Workspace B.